Managing Maintenance Runs with CreataCRM
With CreataCRM, Once you have created your service intervals and Generated the Logs, it now time to use the product. This document will show you how to manage service runs with CreataCRM
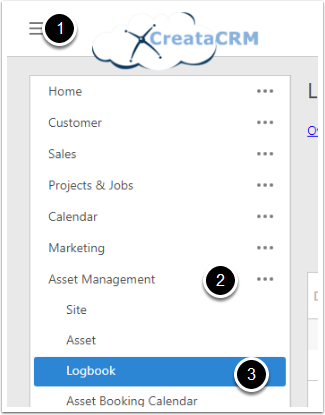
Goto the Logbook Entry
Goto
- Navigation Bar
- Asset Management
- LogBook
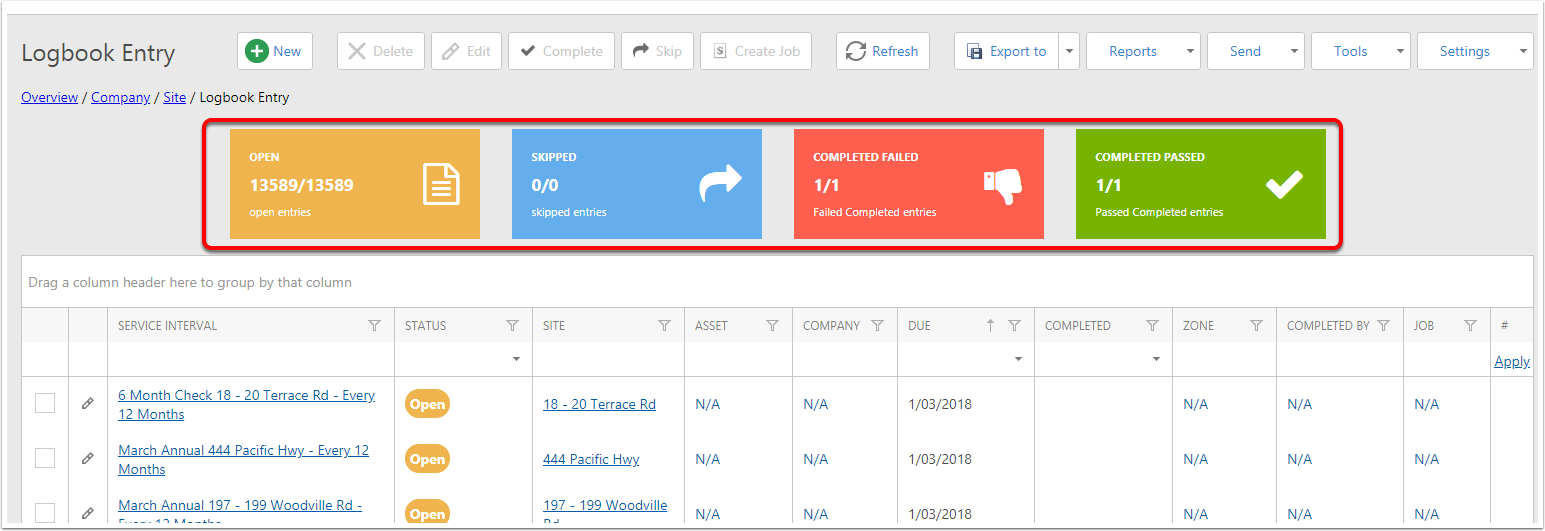
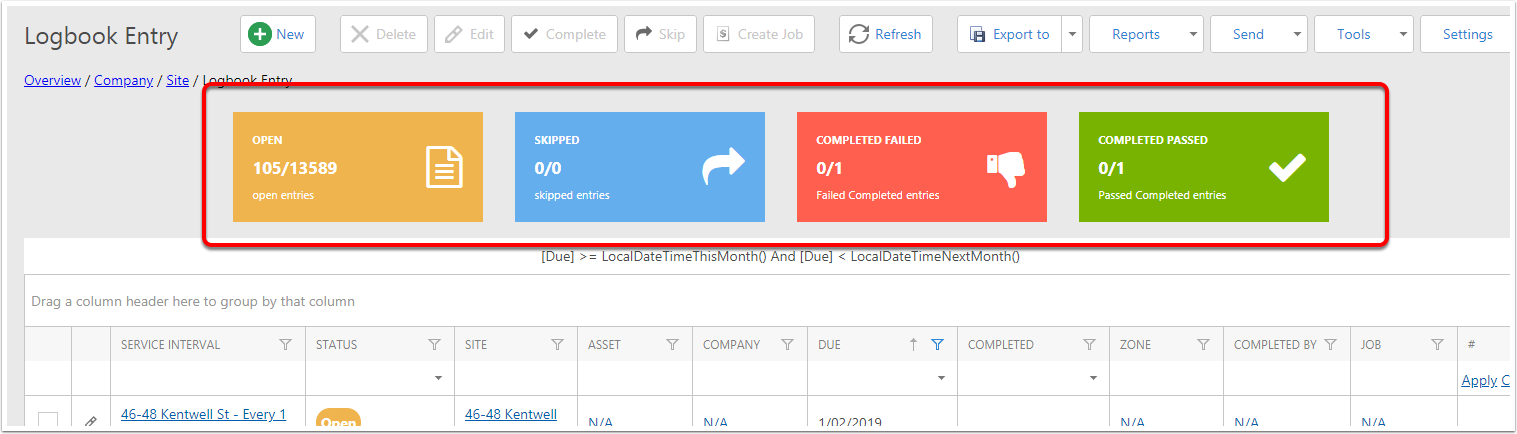
List View of your Service Logs
This is a listview of your Services Runs
Status from the list view
Search on the Time Period you would like to do the Service Runs
To Search the time period for this week or next month or a particular period, you can click on the funnel on the Due Date. This example is "This Month"
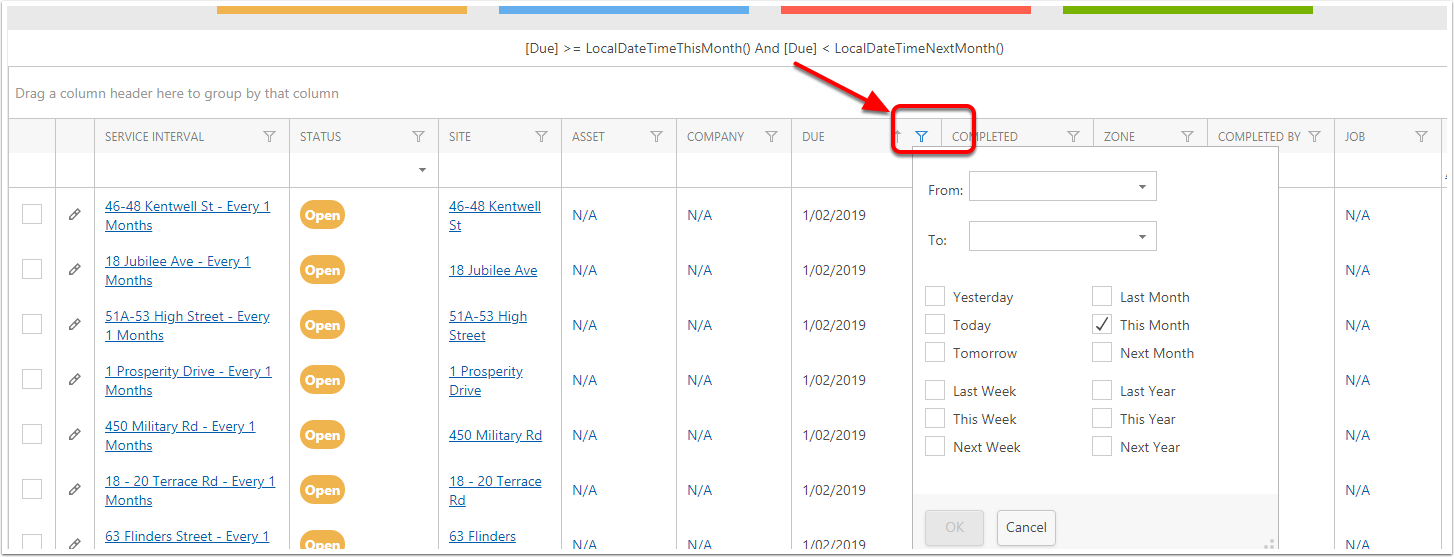
This will filter all the due services this month
This month you have in February
- 105 Open
- 0 Skipped
- 0 Completed Failed
- Completed Pass
Skipping Sites
Skipping sites is great if the client cancels or any other reason to not allocate a service to the techincian to the site
- tick on the skipped sites
- then click on Skip

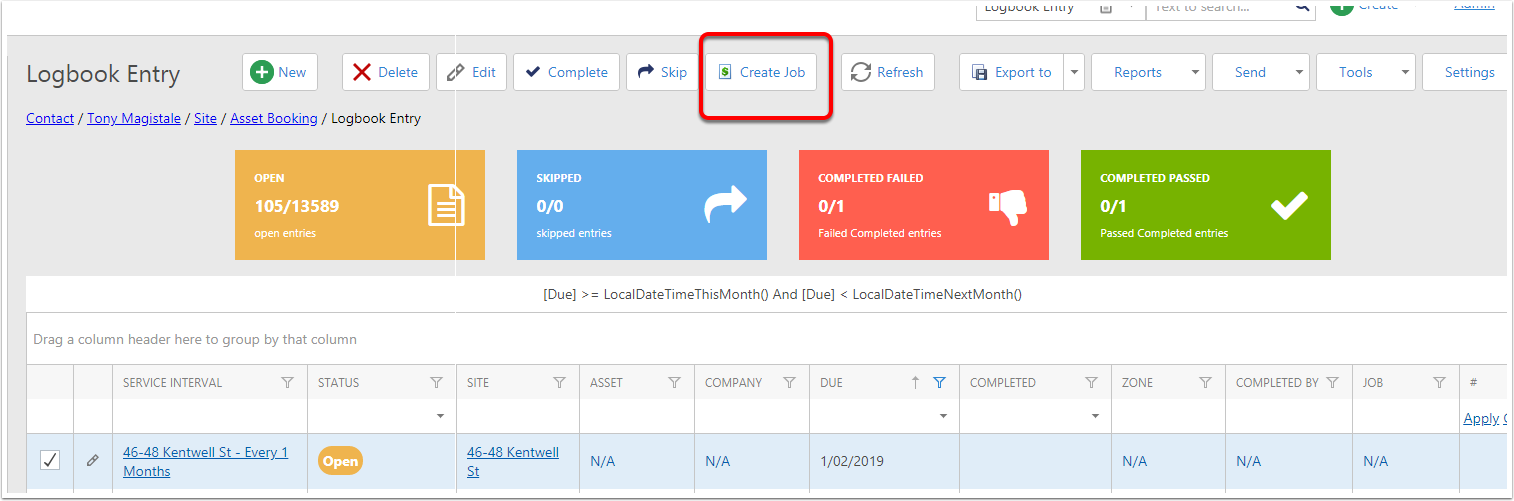
Creating a Job from a Service Run.
Click on the Create Job Button
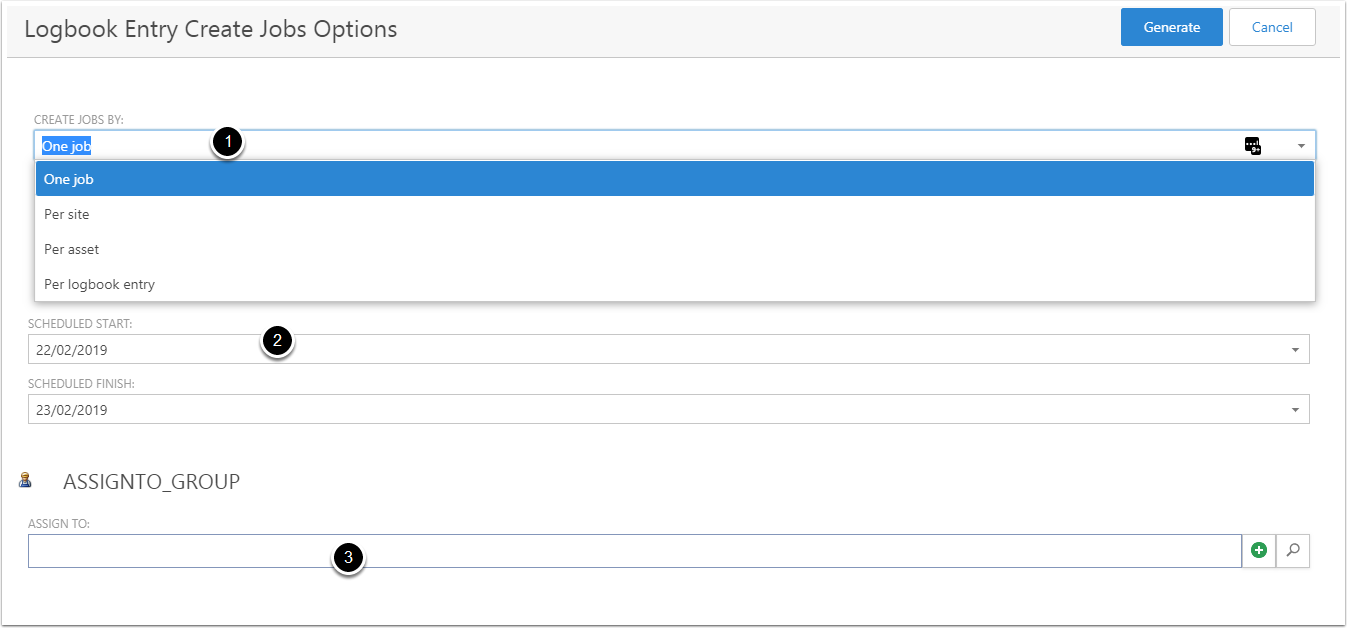
Logbook Entry Create Jobs Options
- This will per Job
- One job - This means Single Job per select of service logs.
- Per Site - This is there is a number of Service log that have been selected, it will group into sites
- Per Asset - This is there is a number of Service log that have been selected, it will group into Asset
- Per Logbook entry means ieach select row will create a Job
- Schedule Time
- Assign to person
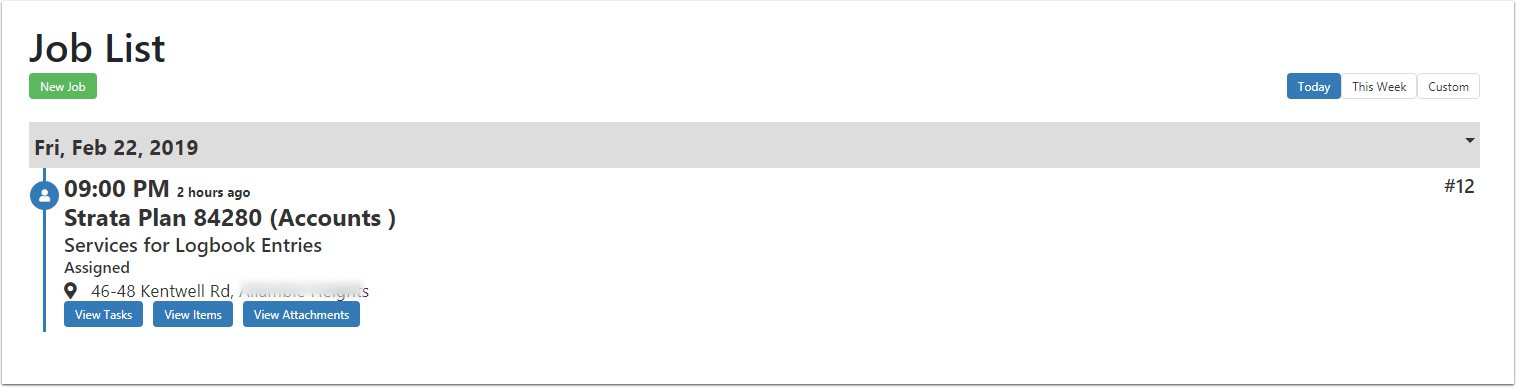
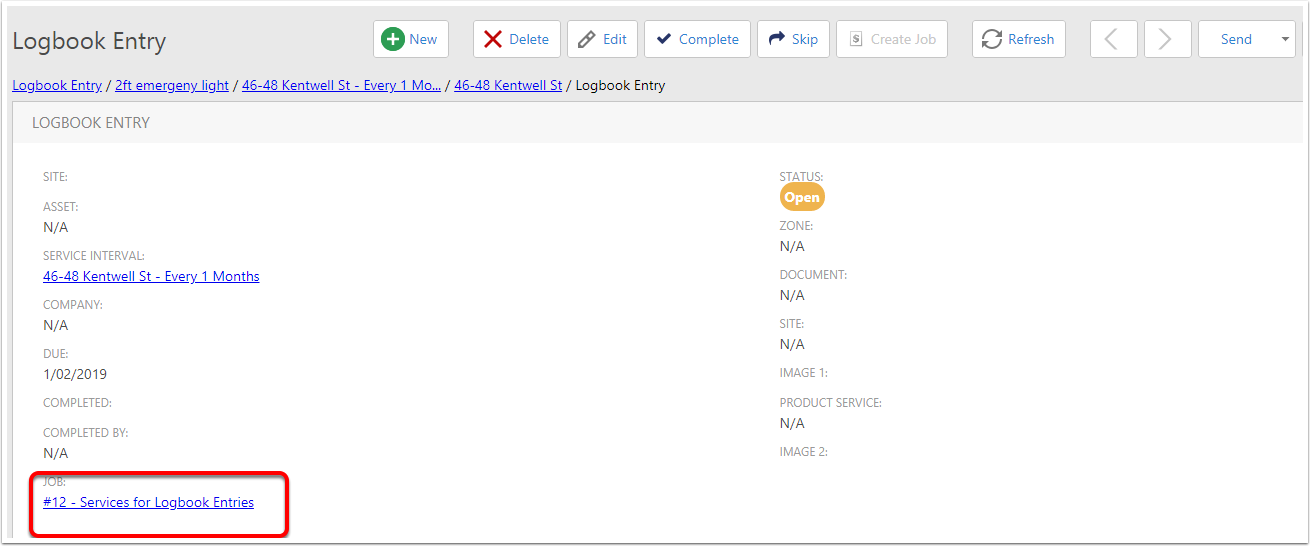
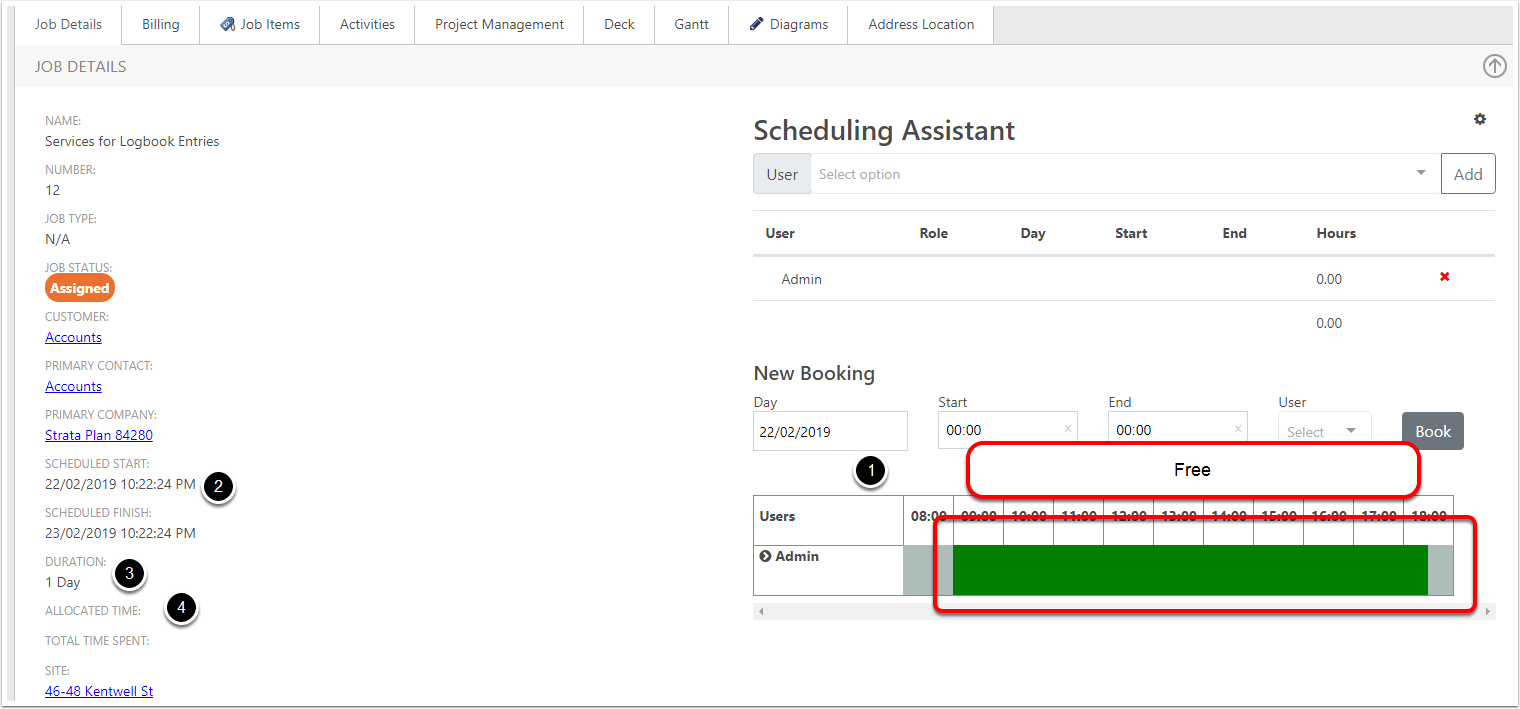
Creates a Job for the Service Log
This will create a Job for the user, this example is for the admin user. Process to click on the Job and Book the time in.
Book the time
Even though you have Assign a job for the user, you will need to confirm their availability, at the moment, the job is Assign, but not booked. Likely you will need to confirm this time.
- Check if the user has available time for the schedule date
- Schedule the Time for the Job
- And the expected allocated time
Book the Time
- Select the time for the for the day
- This will display teh time, this example is 9:00am to 3pm
- This displays 6 hours for the user.
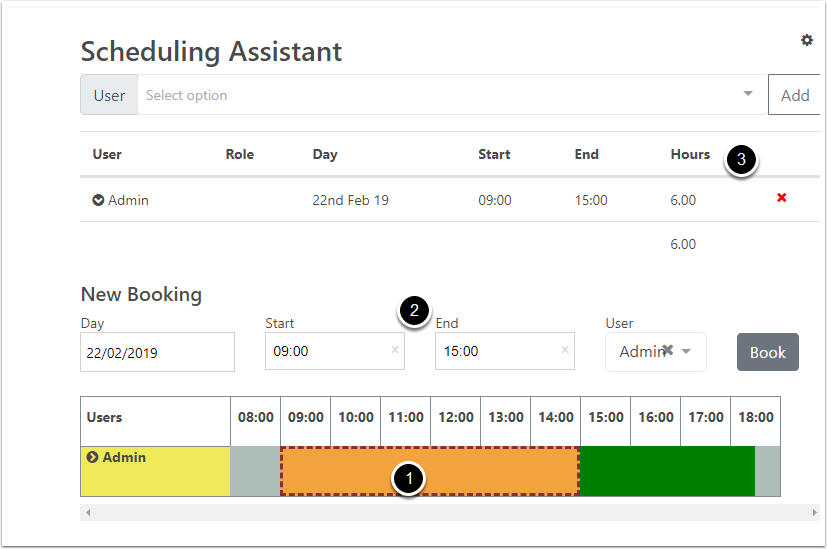
Change the schedule time to Match the Booking
This is Booking time and Schedule time, this is important if you need to do more for one booking
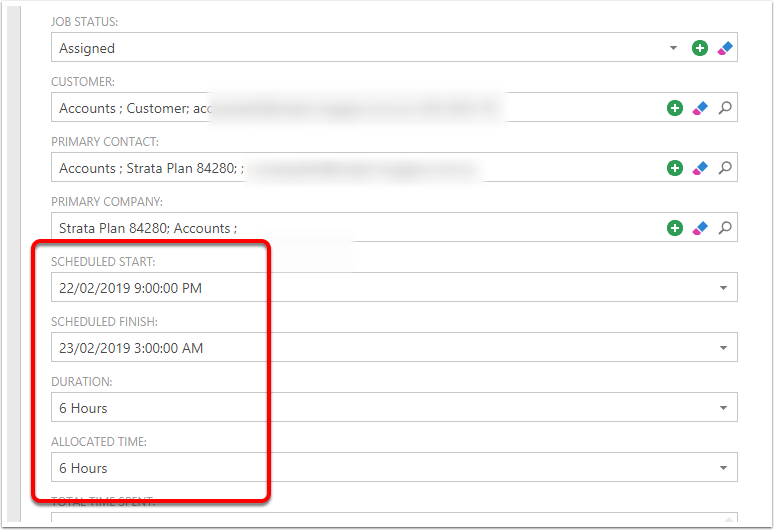
This will Display on the user App
The users will be able to see this on their Job app