Creating Timesheets
This article will describe the process of creating Timesheets in CreataCRM
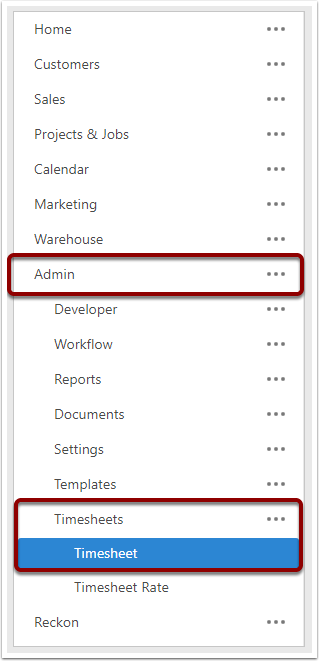
Navigate to Timesheets
Expand Admin, then expand Timesheets and click on Timesheet.
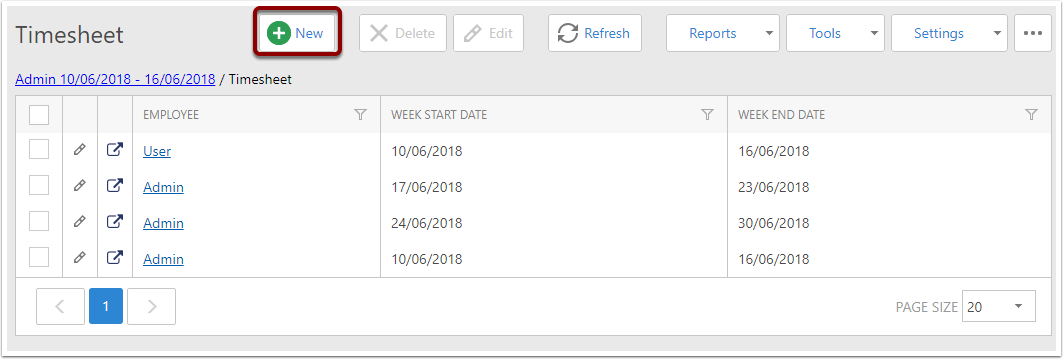
Create a new Timesheet
Click the New button.
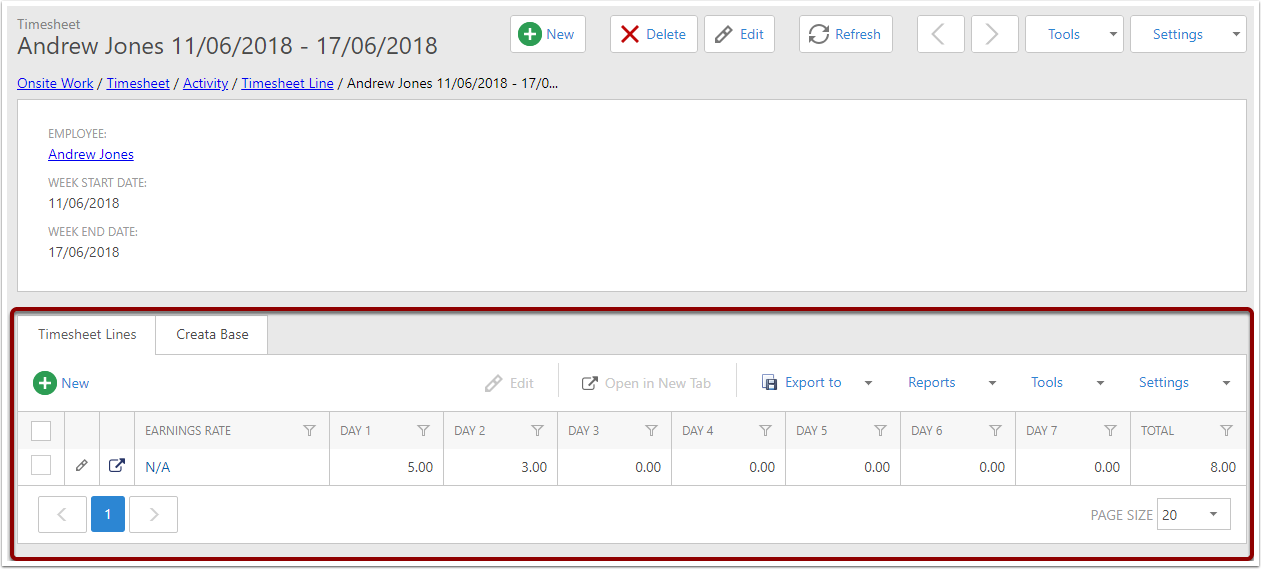
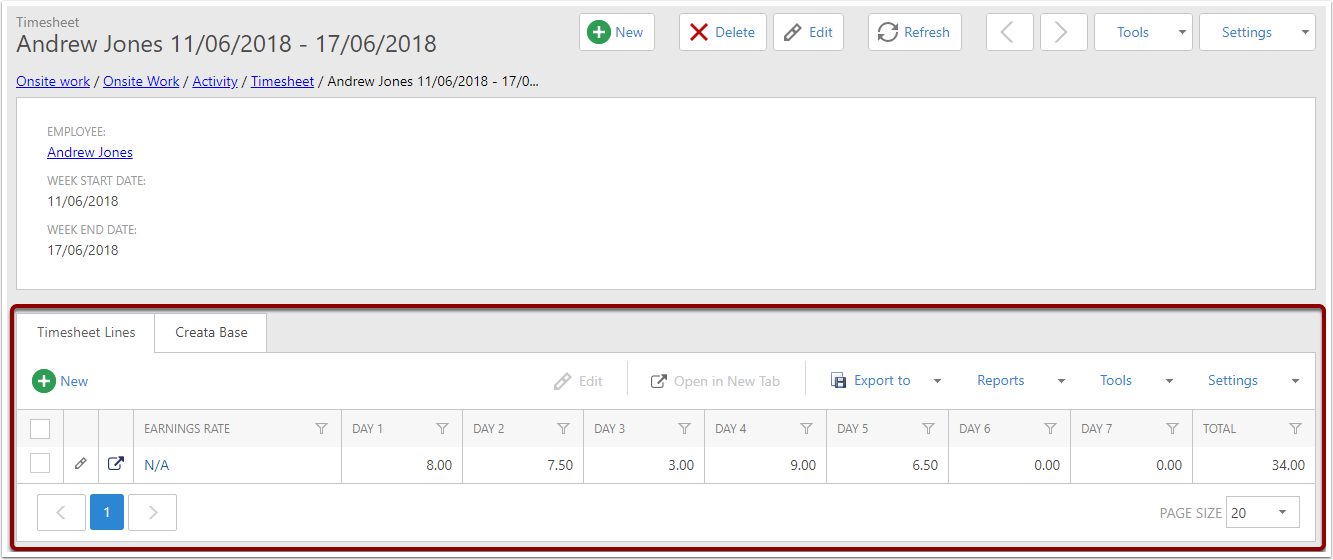
The Timesheet View
Timesheets show the hours a person worked over a 7 day period.
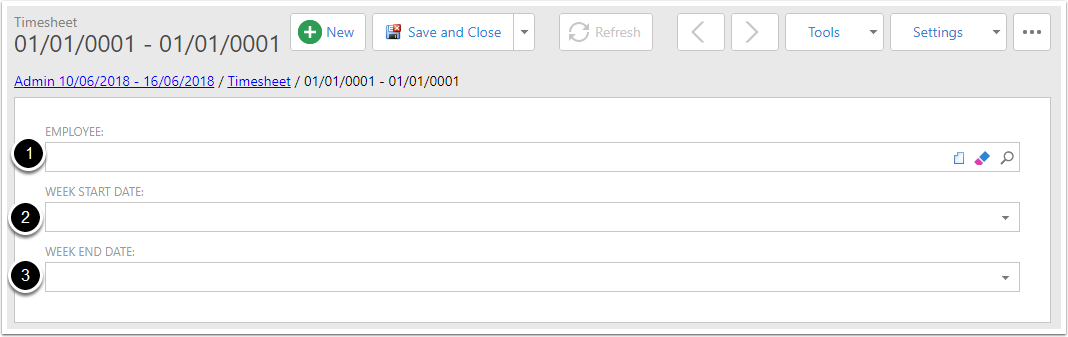
- Employee - The person this Timesheet is for. This person needs to be a User inside CreataCRM. This field is required.
- Week Start Date - The first day that the Timesheet measures. This field is required. Setting this field will also calculate the Week End Date.
- Week End Date - The last day that the Timesheet measures. This field is required. Setting this field will also calculate the Week Start Date.
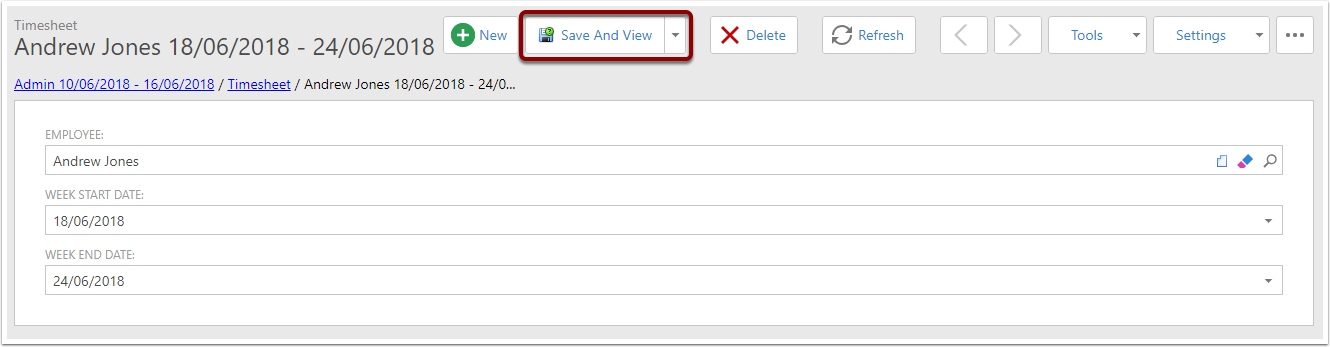
Save the Timesheet
Click the Save and View button.
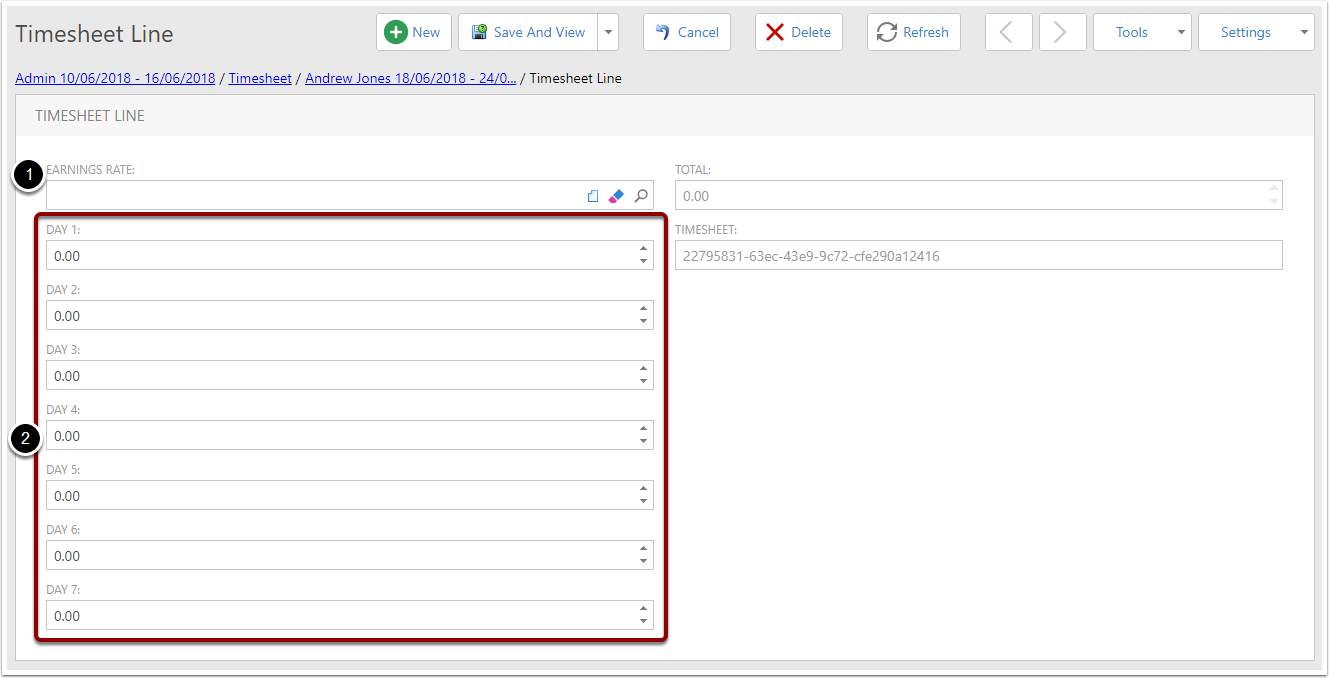
Manually Adding Timesheet Lines
In the Timesheet Lines tab, click the New button.

Enter Time Data
- Enter the Earnings Rate for this line.
- Enter the time for this line, for each of the days in the working week. The time for a single day cannot exceed 24 hours.
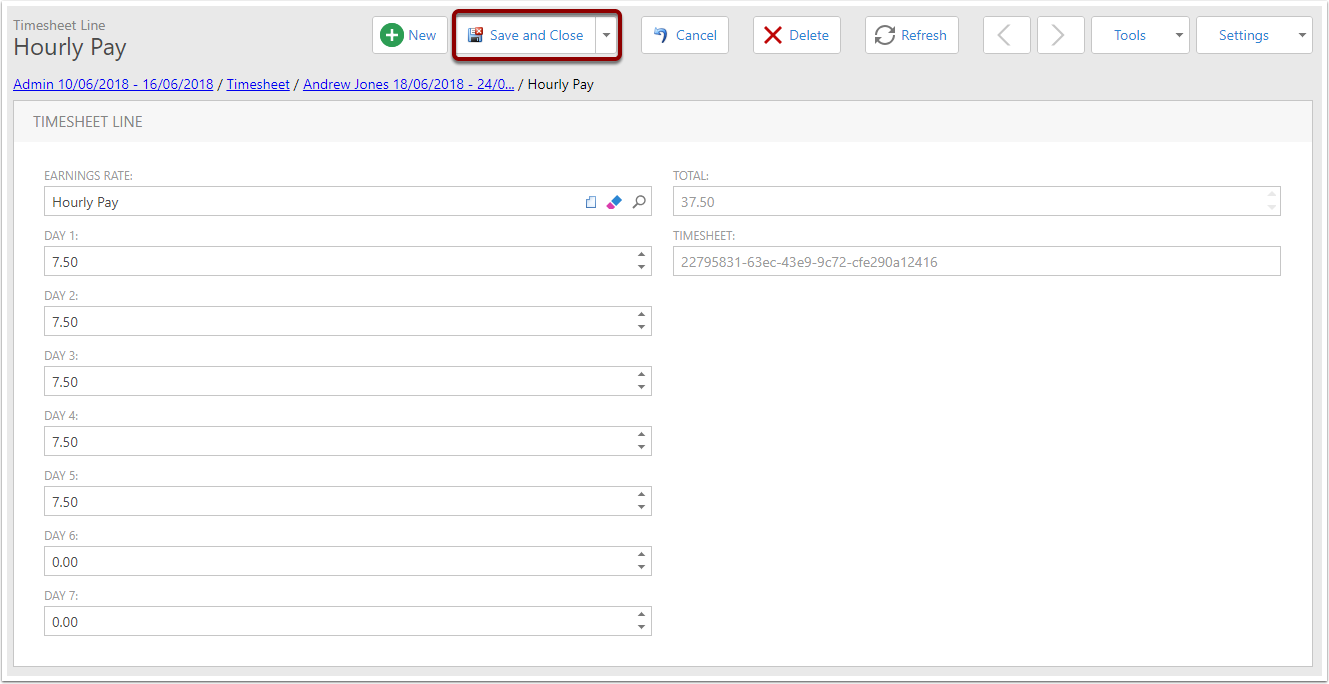
Save the Line
When completed, click Save and Close.
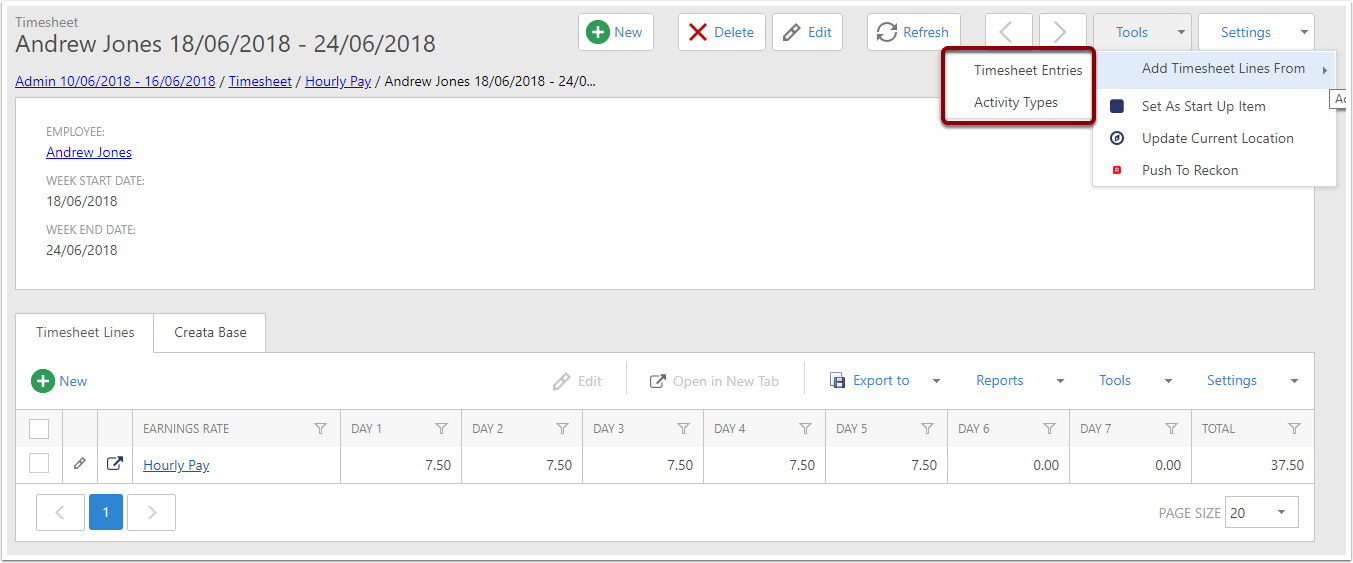
Line Added to Timesheet
The line is added to the Timesheet.

Using Other Data Sources to Add Timesheet Lines
You can add lines to Timesheets using other data in CreataCRM - you can use Timesheet Entries created using the User List's Start/Stop feature, and you can use Activities, filtered by Activity Types.
In the Tools menu, the Add Timesheet Lines From option is available with two choices - these choices are detailed below.
Using Timesheet Entries
This option will gather all Timesheet Entries where the User linked is the same one on the Timesheet, and the Start date of the Timesheet Entry falls in the Date Range of the Timesheet.
This means that (for example) if the Timesheet measures from June 10 - June 16, and a Timesheet Entry started on the 16th but flowed into the 17th, the full duration of that entry would appear on the 16th of June.
Similarly, if an entry starts on the 9th and flows into the 10th, it will not be caught by this Timesheet as it would appear on the Timesheet that covered the 9th.
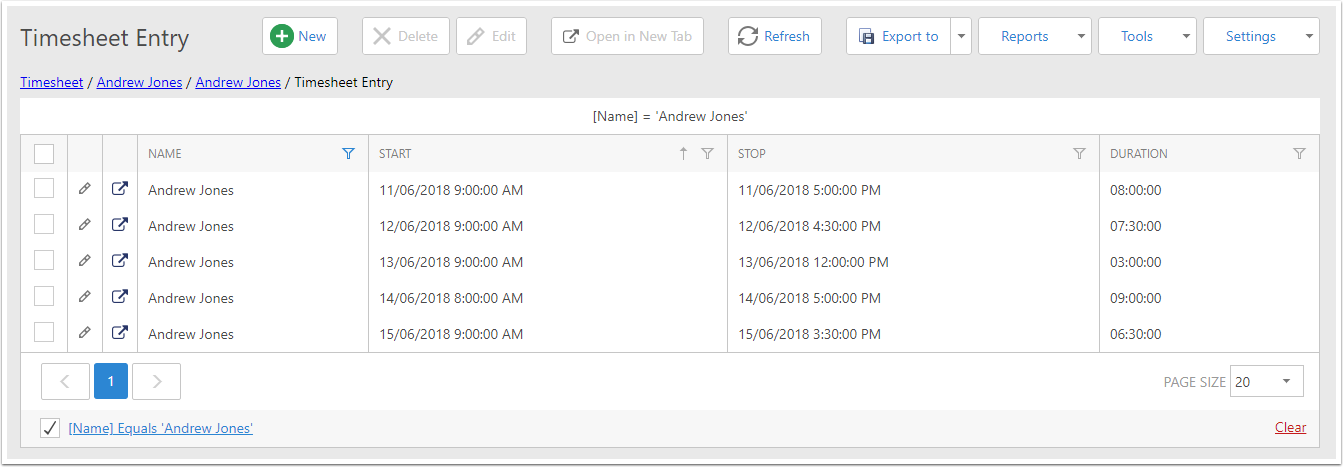
Result
Note that the line is created with no Earnings Rate linked - this will have to be entered manually.
Using Activities
This will show a popup prompting you to choose the activity type you wish to add. Choose the Activity Type, then click OK.

When OK is clicked, the system will look for activities with the chosen Activity Type, where the Employee on the Timesheet is in the Users collection of the Activity, and the Start Date of the activity is inside the Date Range of the Timesheet.
This means that if the Timesheet measures from June 10 - June 16, and an Activity started on the 16th but flowed into the 17th, the full duration of that Activity would appear on the 16th of June.
Similarly, if an Activity starts on the 9th and flows into the 10th, it will not be caught by this Timesheet as it would appear on the Timesheet that covered the 9th.
Please also note that Activities that have a duration of longer than 24 hours are currently ignored, even if they meet all other criteria.
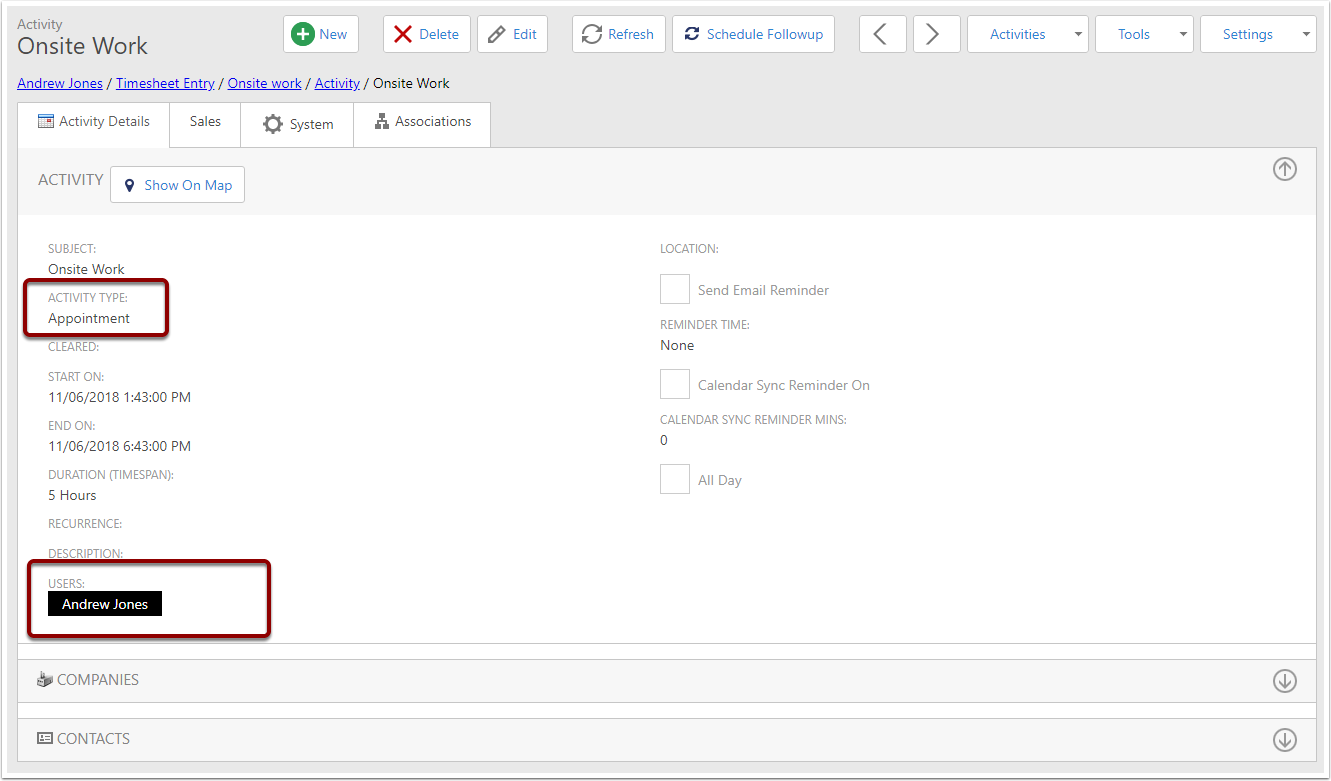
These appointments will be used to create the Timesheet Line.

Result
Again, please note that the line is created without an Earnings Rate, which will need to be added manually.